2023-10-02
Crafting Speed: building a 40% Custom Keyboard
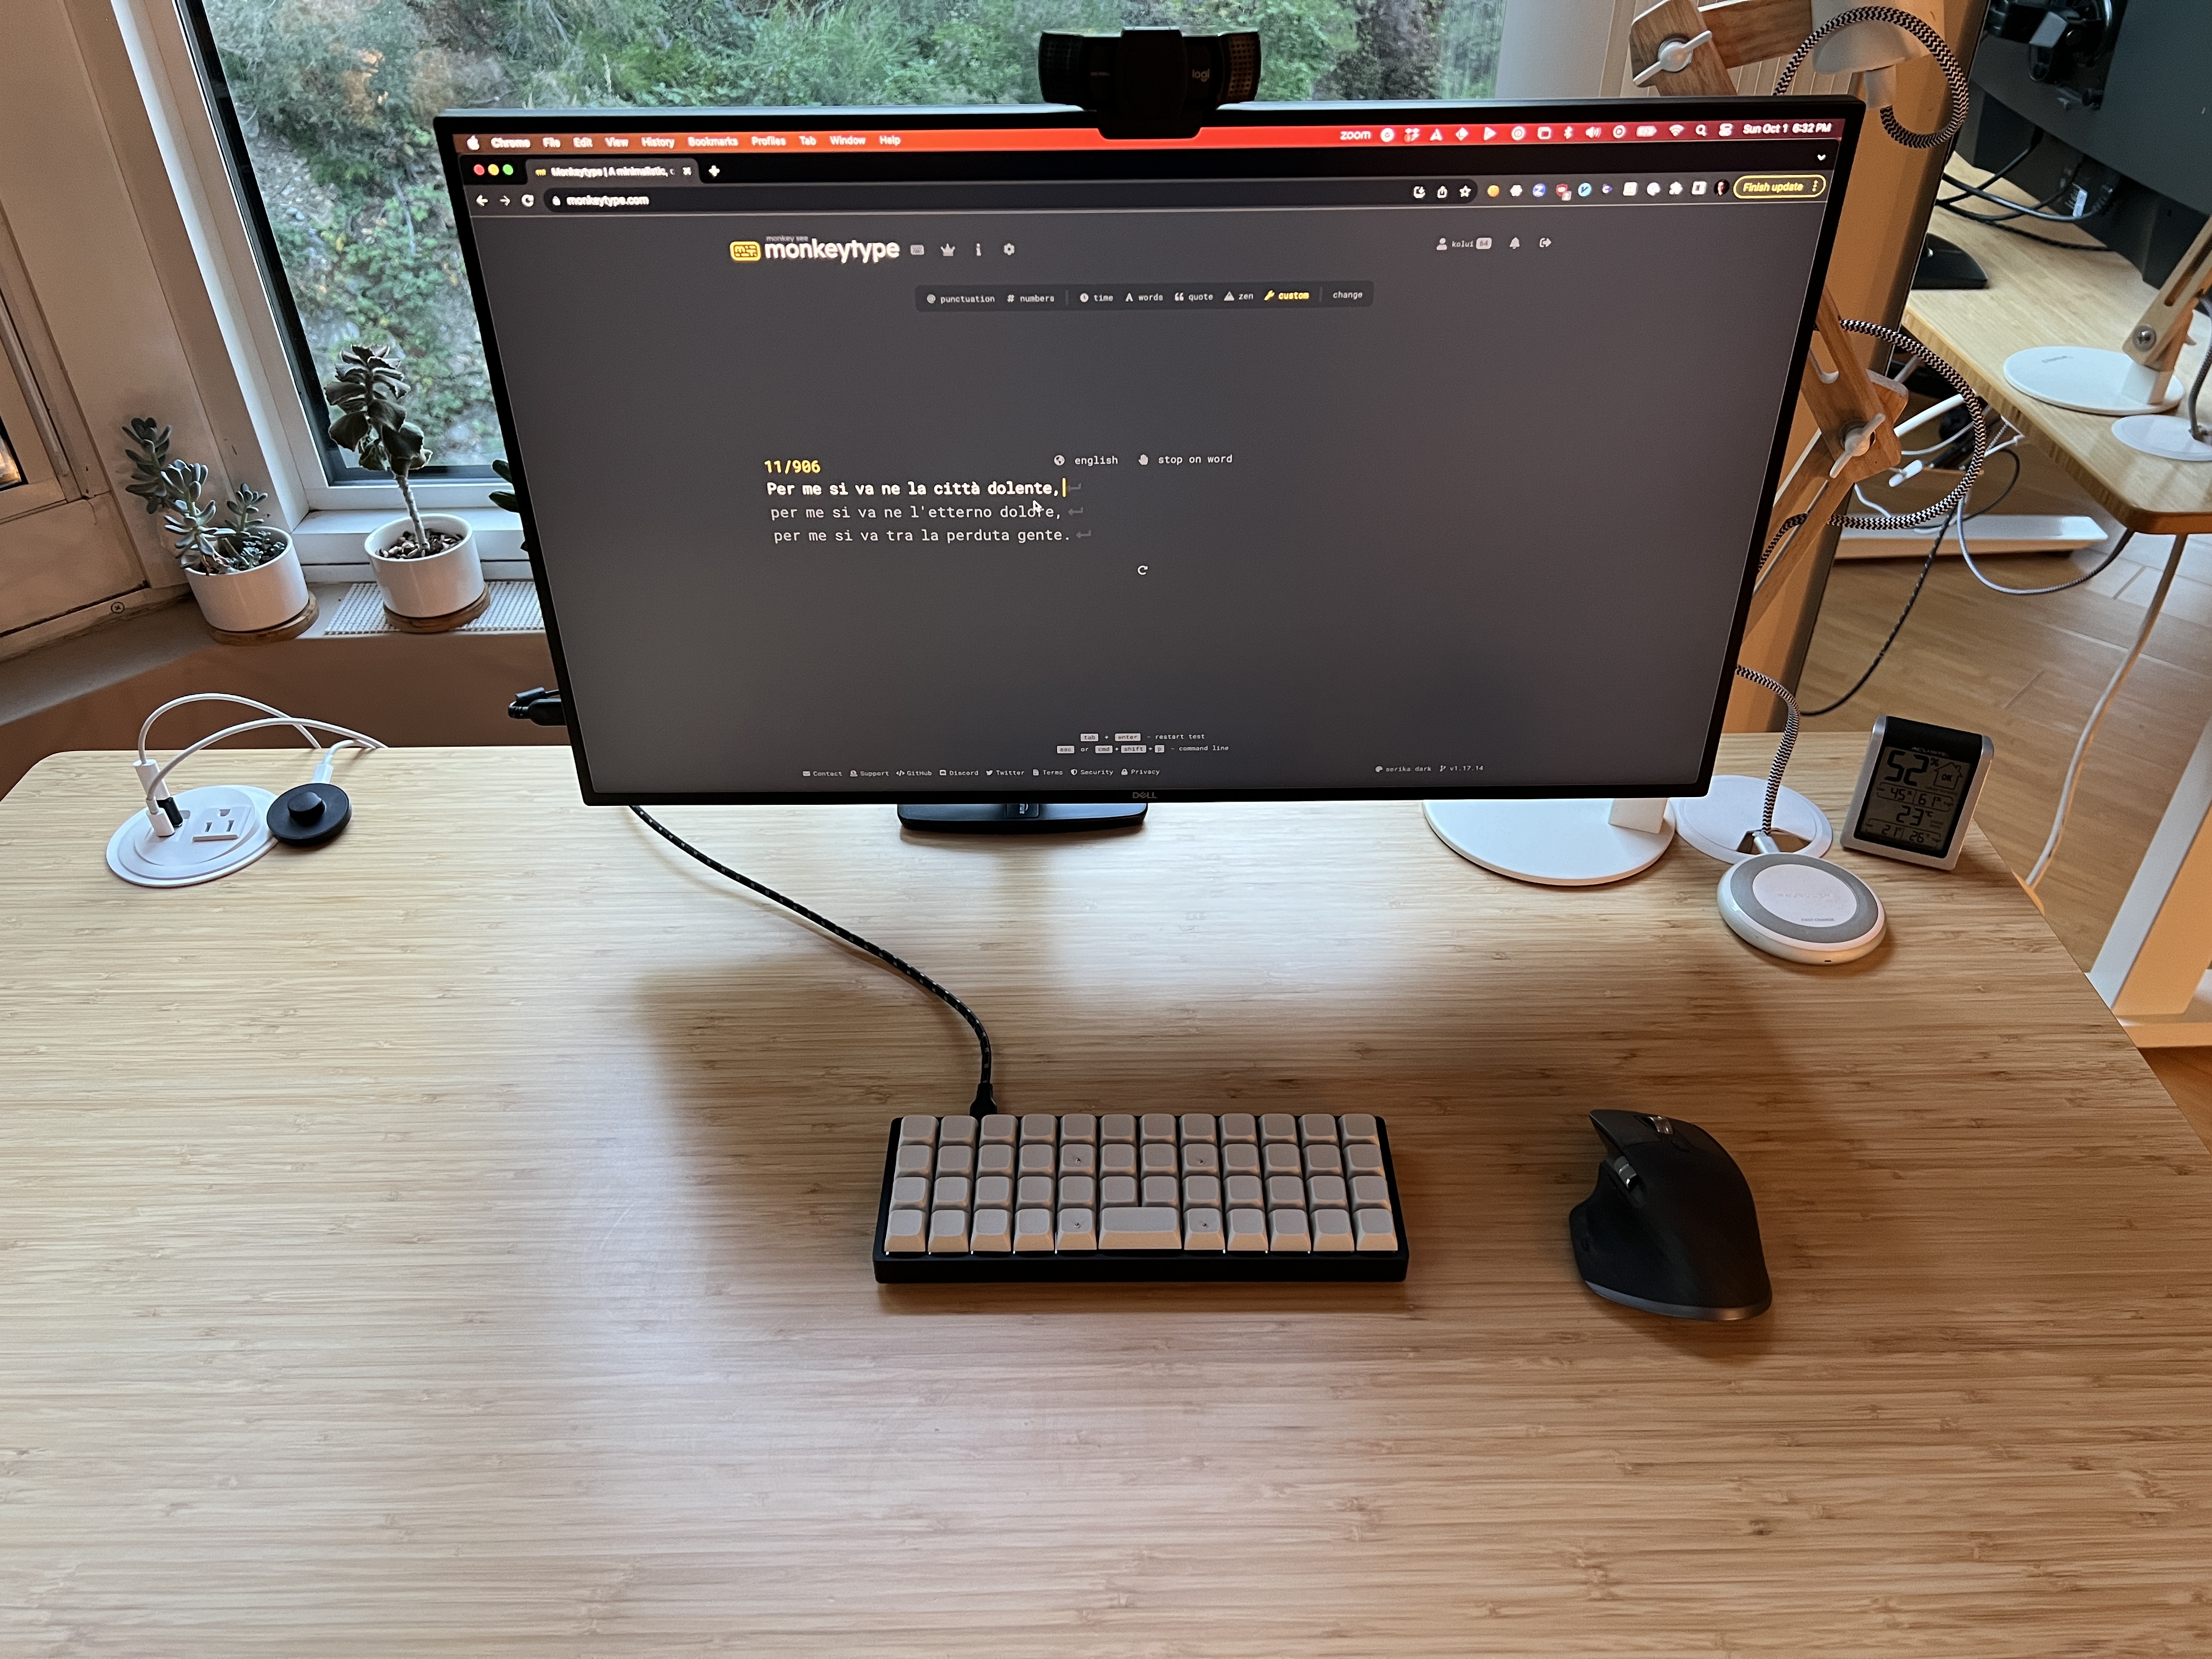
In the past few months, I tried to improve my typing speed on my keyboard and I realized that I reached a ceiling of around 60 WPM (measured with monkeytype.com), so I decided to try to improve it with a new keyboard.
Why a custom keyboard?
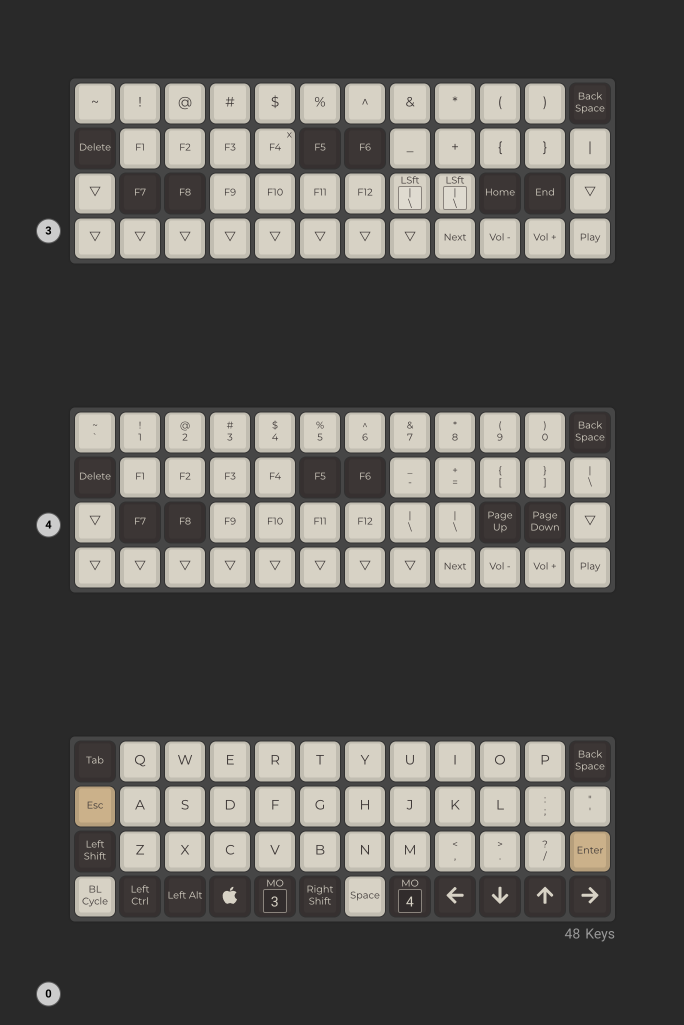
I wanted to increase my typing speed and accuracy. My choice? A 40% layout - encapsulating 4 rows of 12 keys each, a design crafted to minimize unnecessary finger movements. The unique design of this layout allows each key to represent multiple symbols, depending on which of the three layers is activated. Think of it as having multiple floors in a building, with each floor offering different functions for the same space. The unusual layout means spending time learning the new finger positions for the symbols. It’s worthwhile to trade a few learning hours once, for faster typing speeds forever after.
My curiosity extended beyond the surface. I wanted to dive deep into understanding every component and software aspect – the full stack – that brings a mechanical keyboard to life. I built a custom 65% keyboard before, but I never pushed it too far compiling the firmware and customizing the key layout.
I really like minimalistic design with the smallest possible number of features.
Why custom hardware?
Embracing custom hardware is about having the freedom to design a tool that aligns with one's specific needs, especially when mainstream options fall short. With the 40% layout, the market offers limited ready-made choices.
I decided to go with a PCB+case kit that is a good trade-off, allowing me to choose from standard components like switches, mounting plate (floating VS fully-anchored to the case with screws), keycaps and case, skipping the tedious part of designing and soldering a PCB. Since I was already committed to learning a new key layout I also went for an ortho-linear look that is aesthetically pleasing and I find it easier to type with, staggered keys are a now useless relic of the mechanical typewriter that could not get keys physically aligned on a grid.
Why custom firmware?
Firmware is the unseen powerhouse behind every keyboard stroke, interpreting each press and translating it into the characters you see on screen. Custom firmware is preferable to stock firmware because it allows to describe in great detail the keyboard behavior. Many high-quality open-source projects are doing that.
I was planning to customize what letter, number, or symbol goes on every key, having more control over LEDs and sound effects. I had no intention of inventing my super-optimized layout, rather I wanted to remove key codes that I’m not using often.
I also wanted portability: choosing a popular firmware means that I can bring my custom keyboard configuration on another keyboard without rewriting it using a different platform and learning different tools.
The hardware
This is the hardware that I picked:
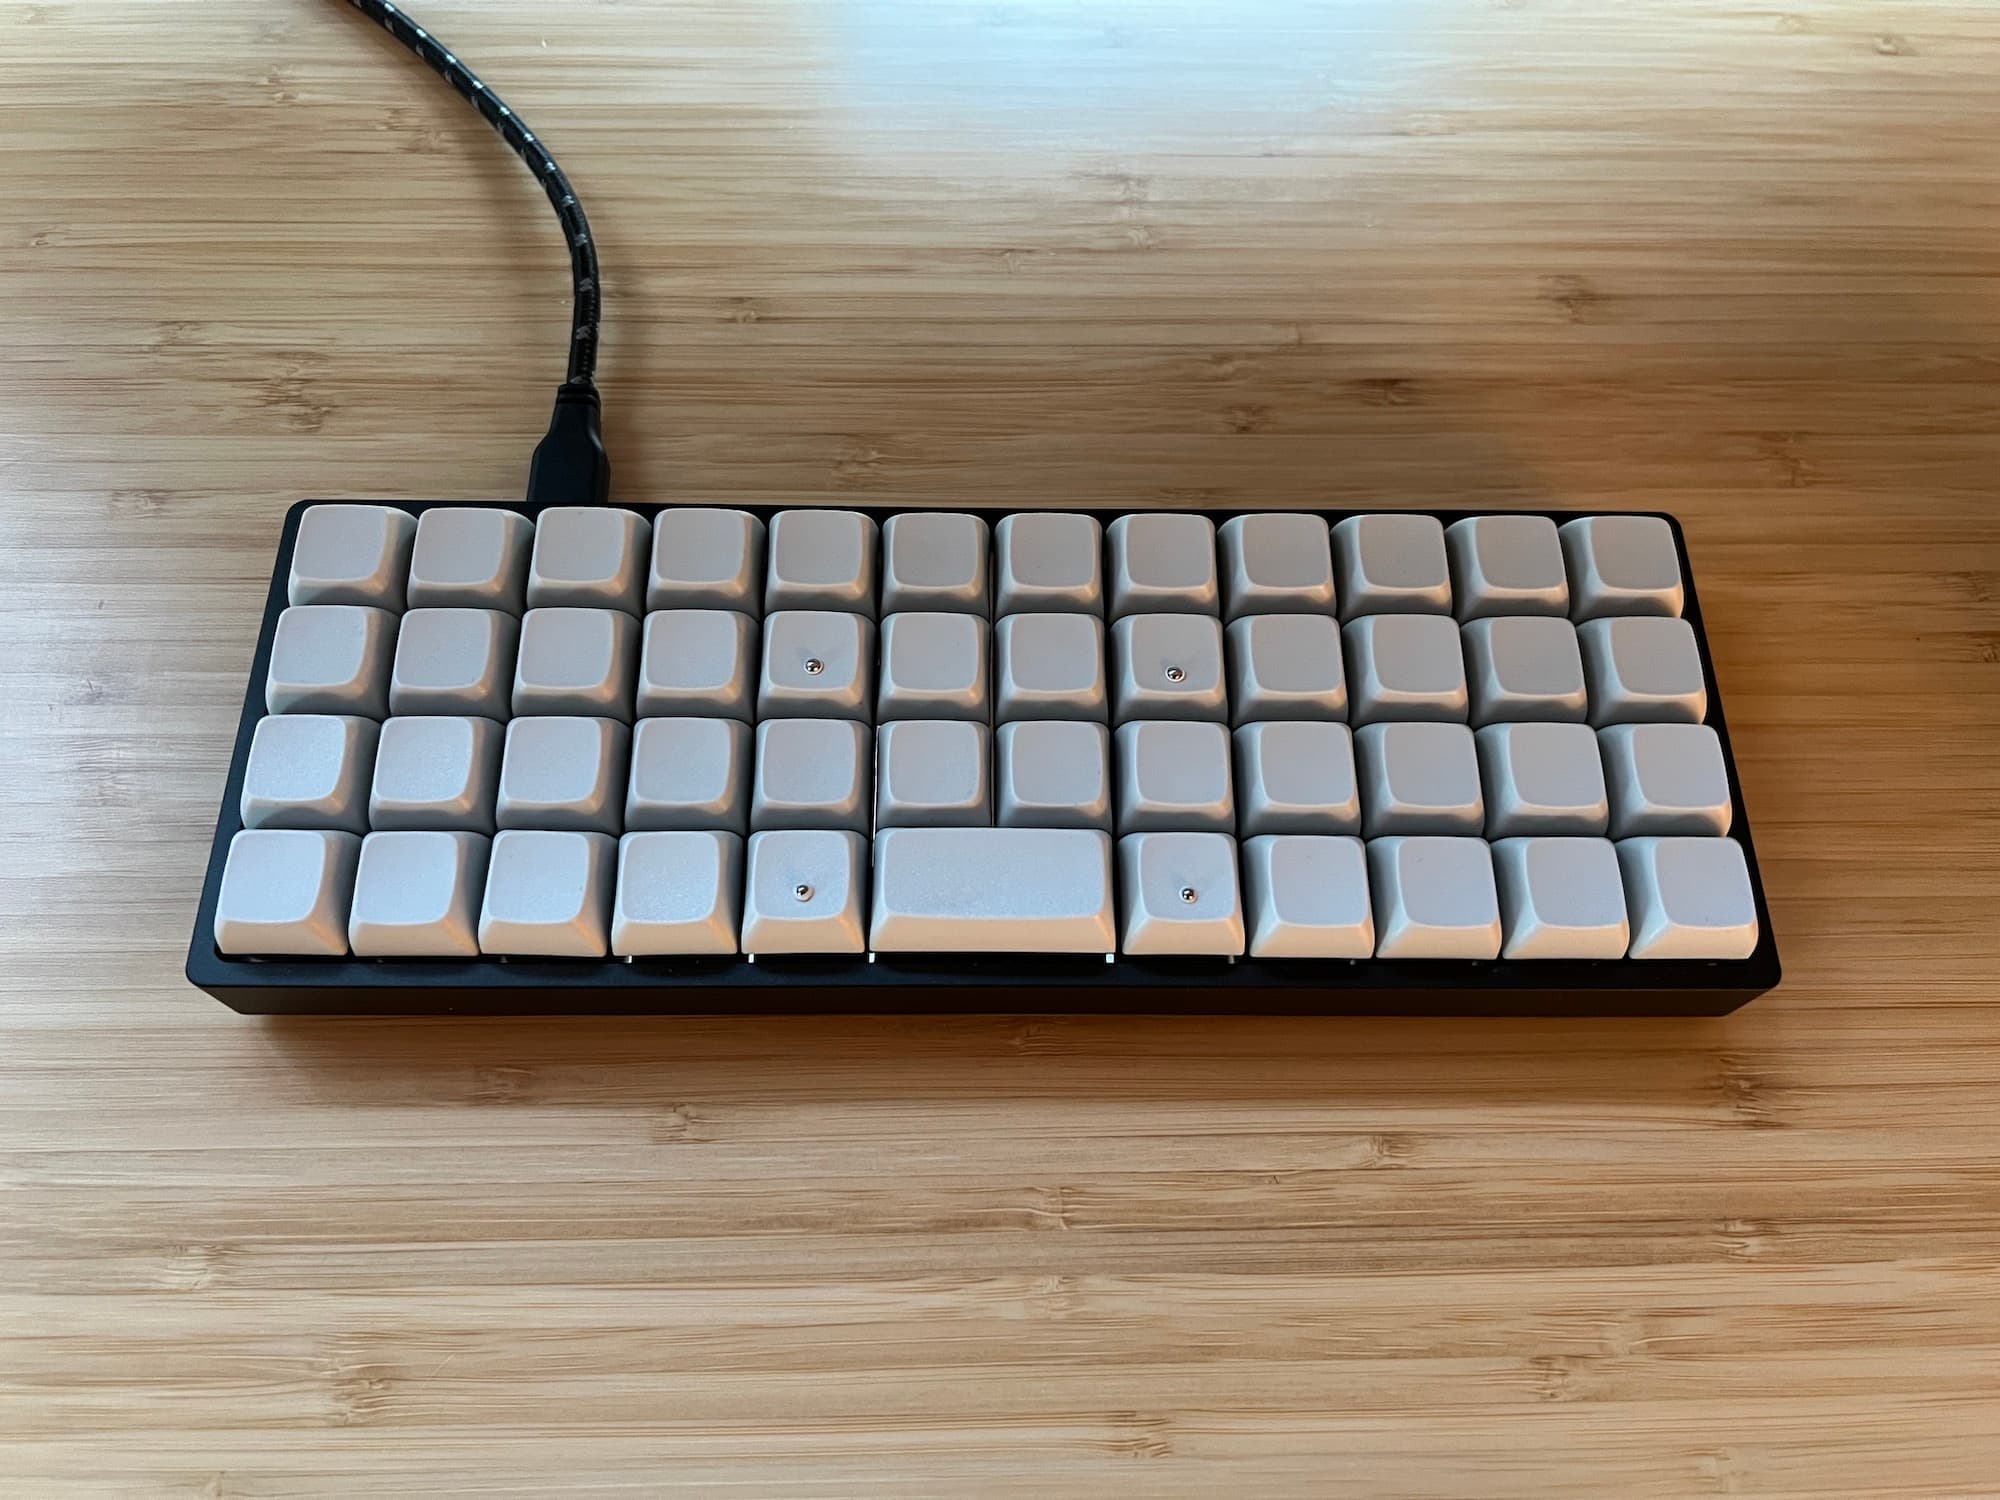
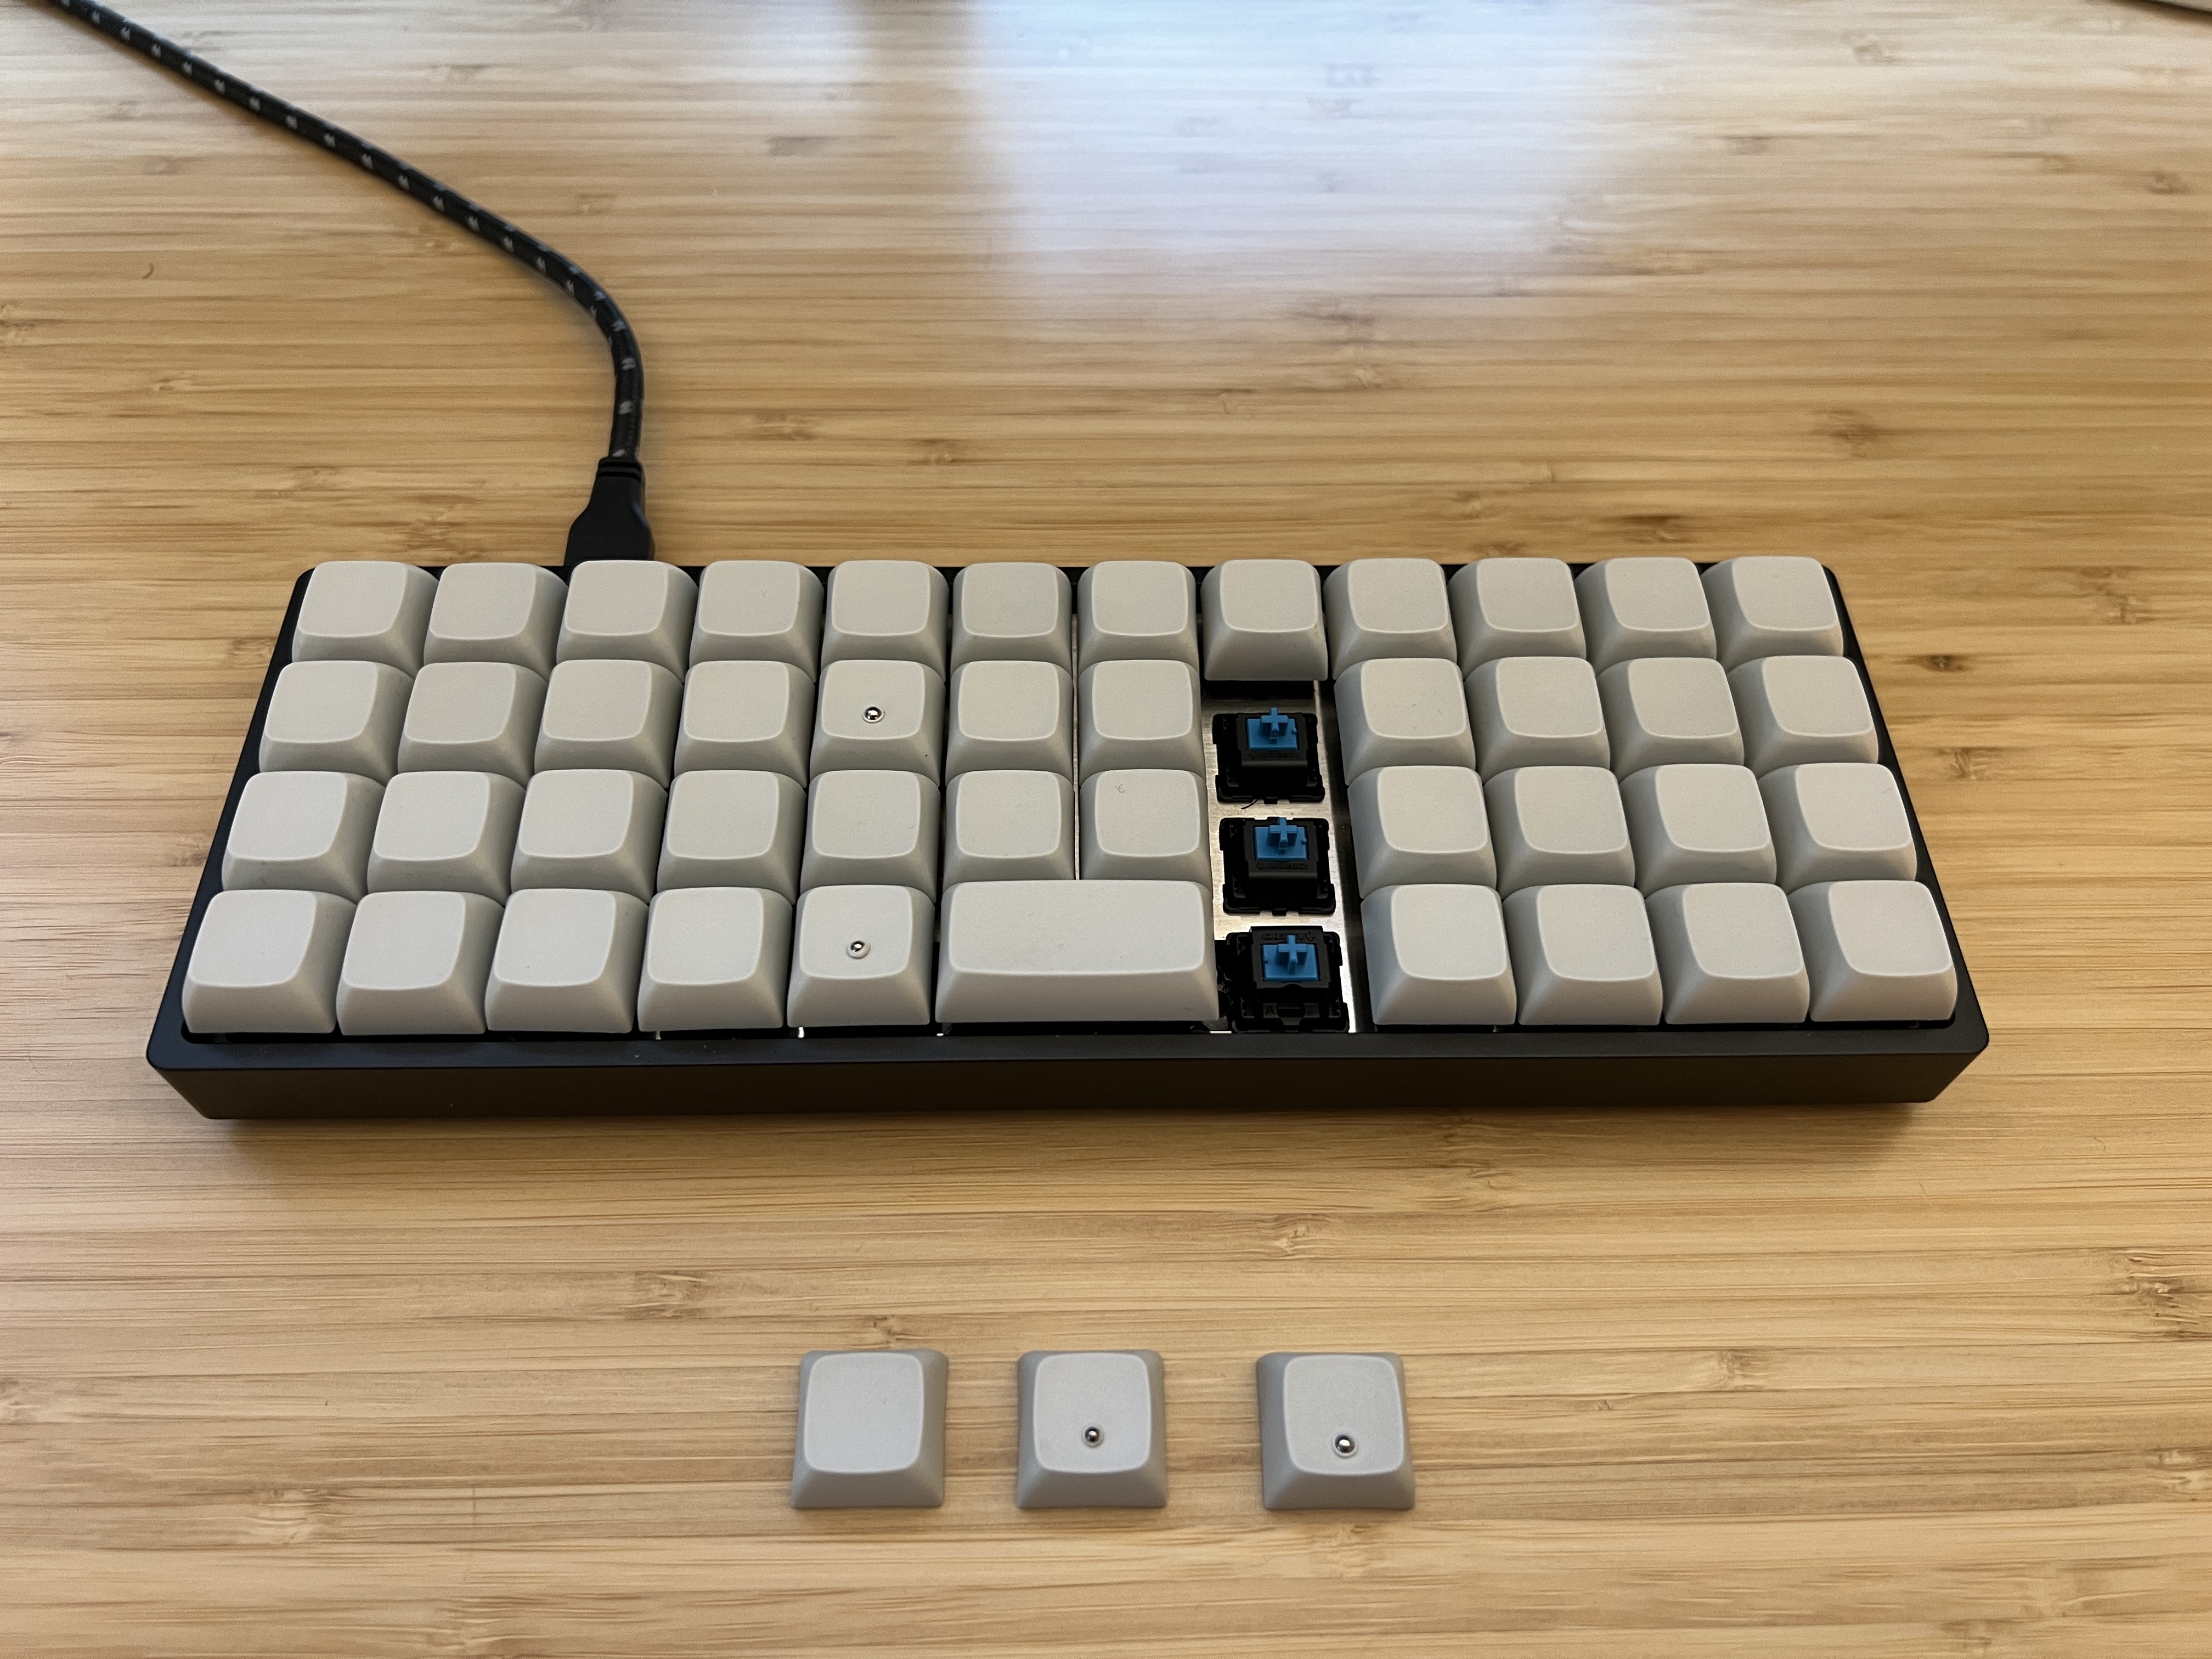
- Planck rev7 keyboard. It has all the characteristics listed above and the QMK firmware supports it. It has hot-swappable switches (no soldering required) that will allow me to change the sound the key press is making in the future if I will decide to customize it further.
- Cherry MX blue switches. They are loud and clicky and provide good tactile feedback every time the key is pressed. They are probably not ideal to use in a crowded office, but I’m mostly working from home these days. I tested 9 different switches and still went with the blue ones that are the same as the previous mechanical keyboard I built (maybe a choice-supportive bias?). It doesn’t matter too much what switches I'm using honestly, switches are a very subjective preference and I can easily change them later.
- XDA blank keycaps. They are all identical with the same height, contributing to the minimalistic look. As a bonus, I could also afford to break some of them while experimenting with adding tactile features. Blank keys are never a problem while typing because you’re not supposed to look at the keyboard, ever.
- Built tactile keycaps. Since the fingers always need to return to the home row position, I found that adding some tactile features really helps me never second guess if the indices and thumbs are in the right place, and I gained 10WPM just with this trick. After enjoying some hours of manufacturing experiments (with the unfortunate byproduct few murdered keycaps) I decided to embed little ball-bearing spheres inside the keys using a soldering iron to melt the surrounding plastic and get them attached to the keycap permanently.
The firmware
I decided to go with QMK firmware because for the reason is the most popular and supports the hardware I wanted. It seems well maintained with 16K Github stars and 26K commits, it has a lot of good documentation, and given the many keyboards it supports I’ll be able to bring my custom configuration with me in the future. I also considered two less popular alternatives: TMK and ZMK with respectively 2K and 4K Github stars.
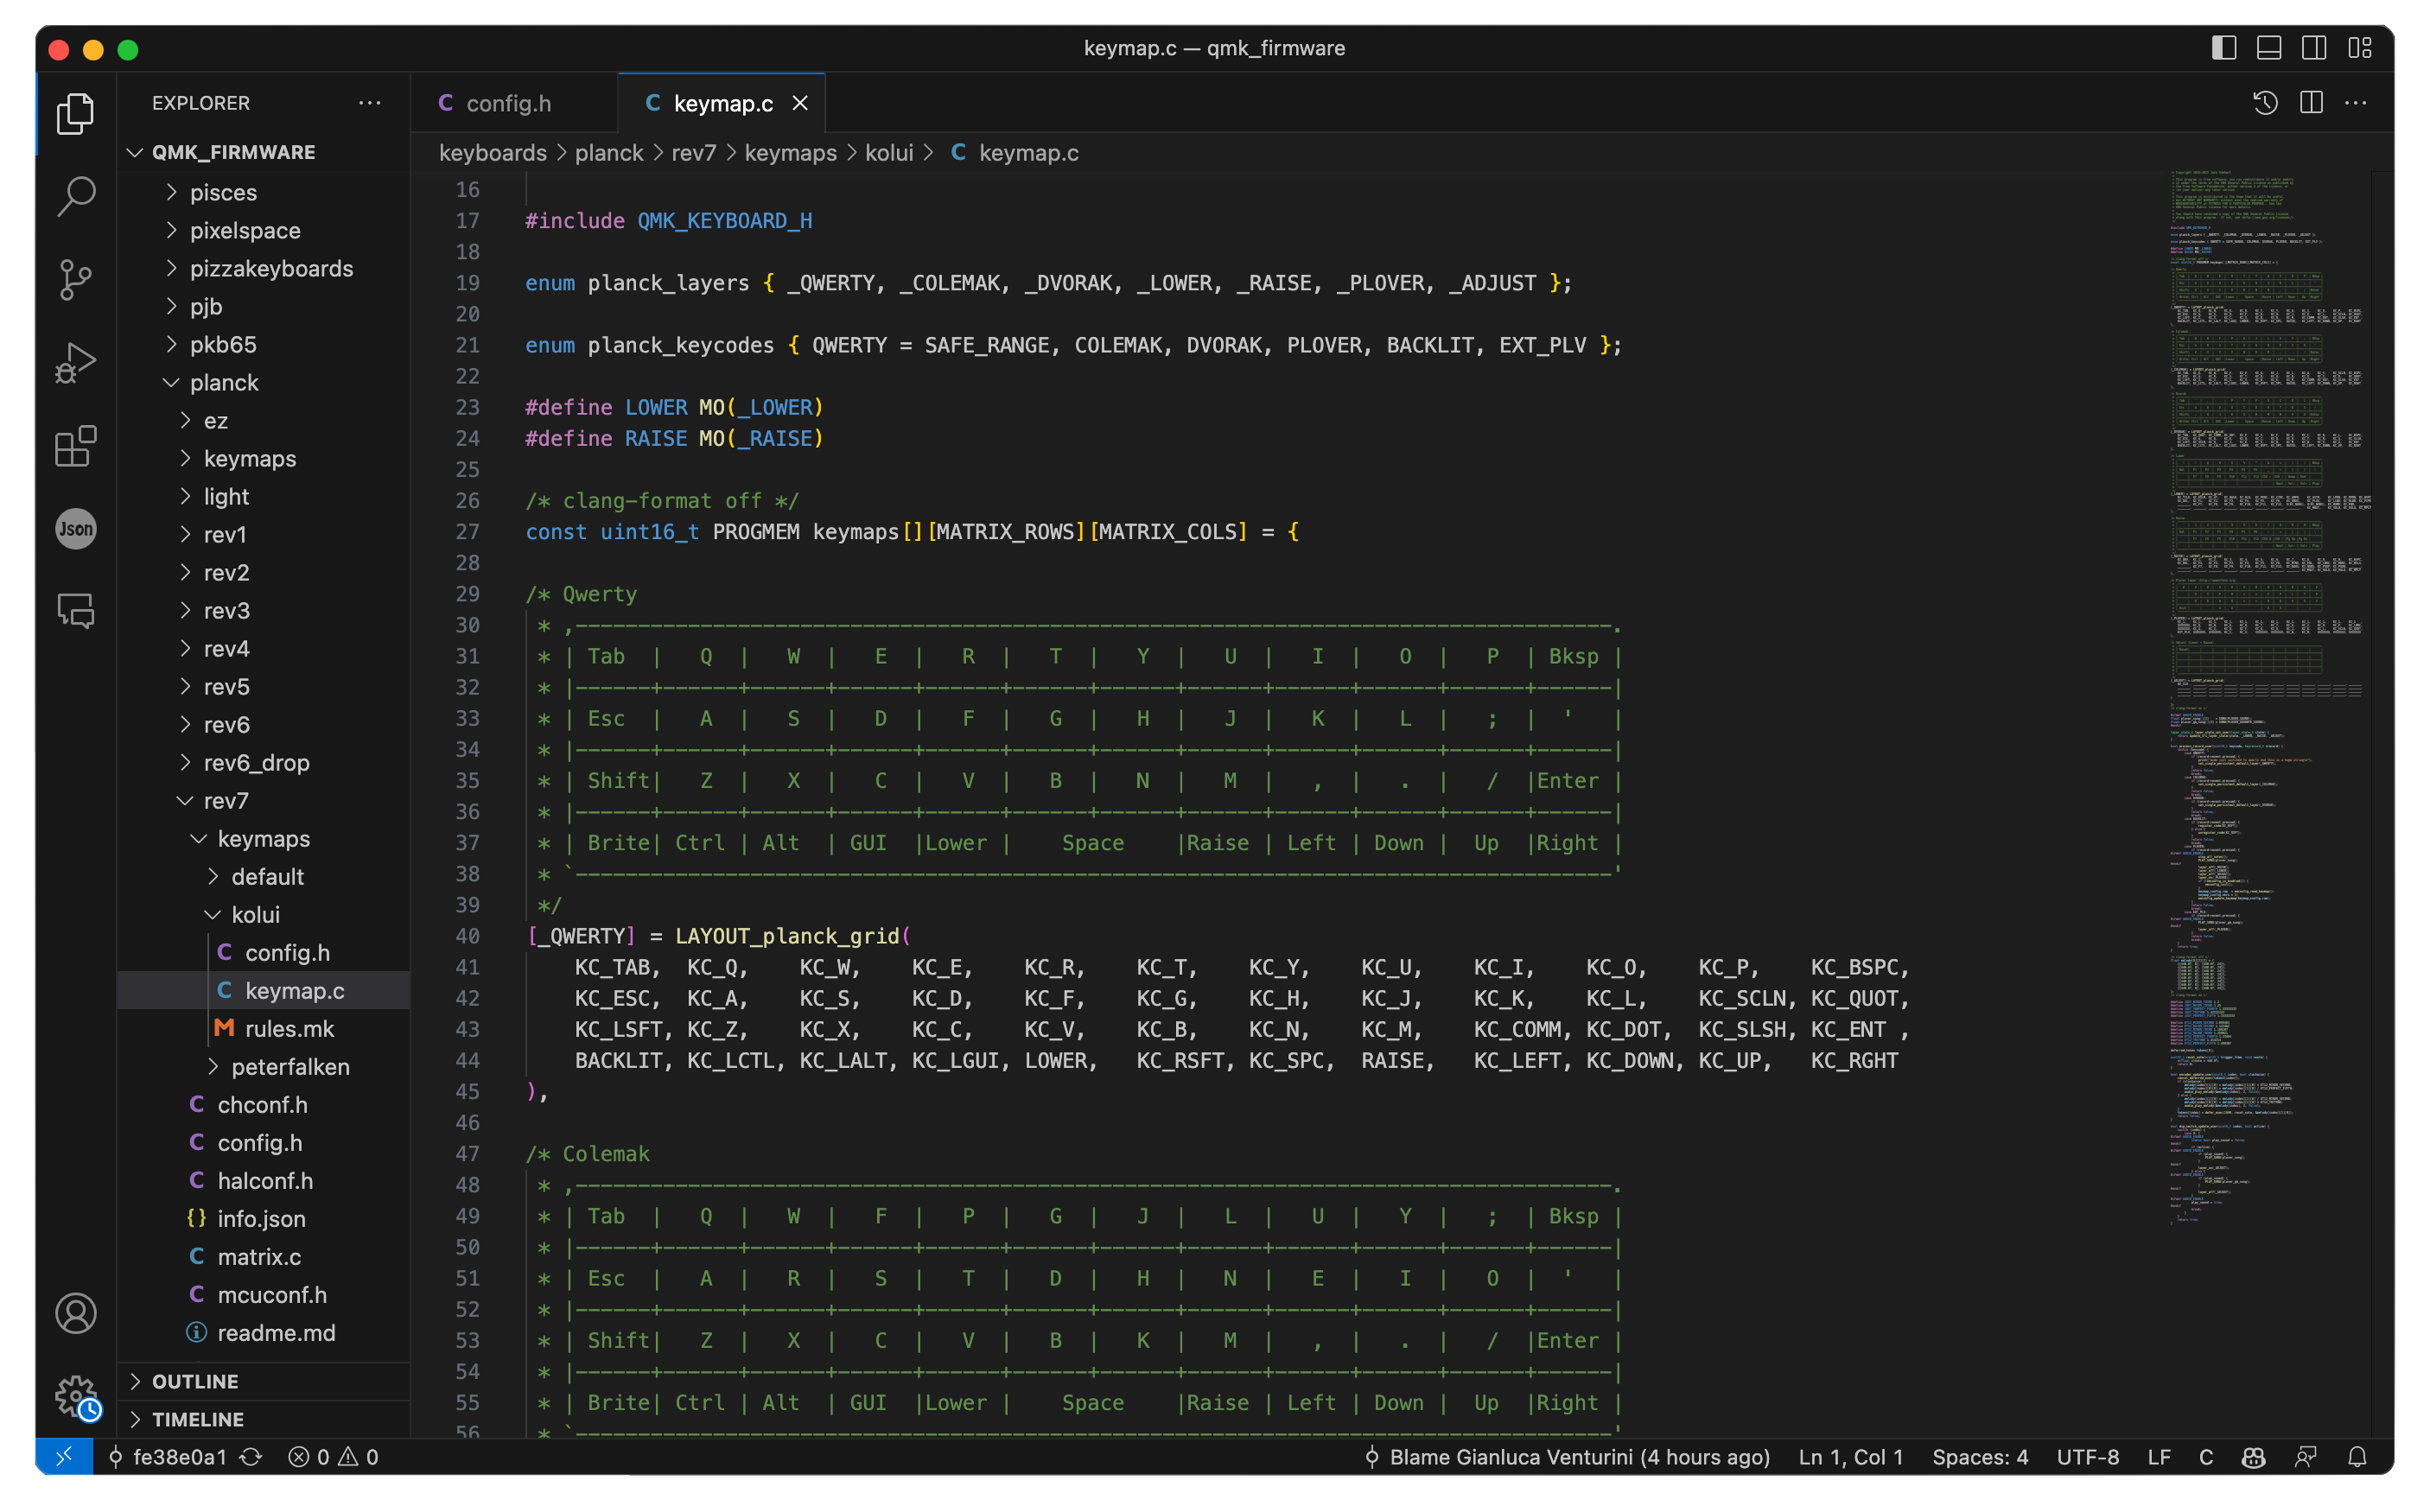
To build a custom keymap I just needed to create a keymap.c and config.h, using the tooling and documentation provided by the community it’s quite easy and intuitive to change.
It compiles in a few seconds and the community also has a nice web tool to compile the firmware from the browser. I didn’t use the web tool because I wanted to disable features, only possible with changes to the underlying C code. I also wanted to learn the structure of the codebase and tooling to have a sense of how well-maintained and usable the ecosystem is.
Lastly I removed all the features I wasn’t using from the default layout the PCB manufacturer provided:
- AG_SWAP keycode: it swaps ALT and GUI keys. It’s a pretty awful feature: I triggered it once by mistake and I needed to reset the EEPROM to go back to normal (on the plus side now I have a key for fast EEPROM reset!).
- Removed all custom layers that arrange letters in different orders: Dvorak, Colemak, Plover. I can barely type on a Qwerty, I’ll definitely not going to miss the others.
- LED lights: I always found them distracting, they are just a distraction since you are never supposed to look down at the keyboard.
Conclusion

As of today, I’m writing somewhat consistently around 70WPM at 95% accuracy, up from 60 WPM with my previous 65% keyboard ceiling, but I hope that with more practice I can further improve.
The time I spent on the project was
- 2 evenings to research the different components
- 1 hour to assemble and test the keyboard
- 2 hours to develop the process of creating tactile features on the keycaps
- about 6 hours spread through a week to bring back my typing speed to an acceptable level.
Whether you aim to construct one or merely appreciate the craft, I hope this blog provides insights into the journey. Happy typing!